This article, Connecting SES to WordPress, assumes that you have created an account on Amazon’s Web Service (AWS) and have a working knowledge of configuring WordPress. On AWS, you may a free tier option to use, but it’s a good practice to add a billing method as a backup.
You’ll also have to have access to your domain’s DNS settings so that you can verify your domain with AWS.
Verifying Your Domain
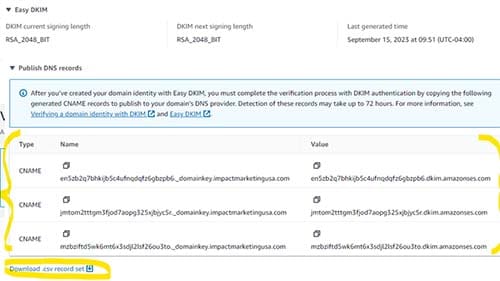
In order to use Simple Email Service (SES) with your WordPress installation, you will need to verify your domain. This is done by adding three CNAME values to your domain’s DNS record. What I prefer to do is to have SES open in one tab and my DNS management in another tab.
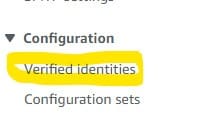 Log into the AWS console and select SES. On the left side, under Configuration, you’ll see a category called Verified Identities. Click on that item.
In the middle of the page, you’ll see a button labeled Create Identity. Click on that.
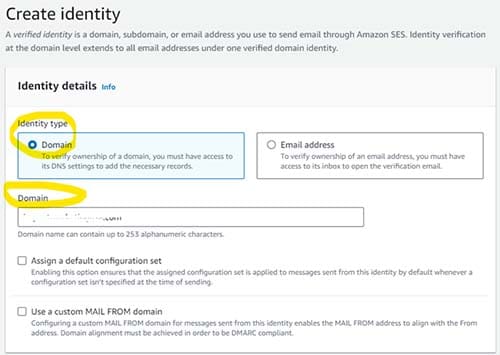
You’ll want to choose Domain as your Identity Type. Then, enter your domain name in the provided box. Leave the next two checkboxes unchecked.
Scroll down and expand the Advanced DKIM settings. Select Easy DKIM and a strength of RSA_2048_BIT signing key length. You can uncheck th box about publishing records to Roue53 if someone else (not Amazon) is hosting your DNS.

Scroll to the bottom of the page and click Create Identity. On the next page, we’re going to get the records you will need to add for your DNS settings. It’s beyond this article to try to cover how each DNS provider prefers their records. We use DNS Trust Manager for our DNS.
Expand Easy DKIM and expand Publish DNS Records. You will see all three of your CNAME (host/value pairs). You can copy and paste them directly into your DNS records.
Navigate back to the Verified Identities page. While DNS records are propagating, you’ll need to create a user account to use the SES Service. Amazon will notify you if your domain has been validated or if there is an issue. You will not be able to use the SES service until your domain is validated.
Identity and Access Management (IAM)
User accounts at AWS are managed by their IAM service. We will create a user that has the permissions to use the SES service for the domain you just created. It’s a good practice to create a user account for each domain.
Navigate to the IAM service and click on Users (under Access Management) on the left side. In the main section of the page, click Create User.
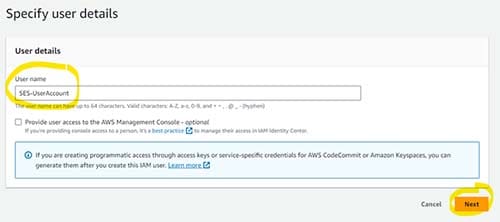
Enter the user name and click next. My advice is to construct a name that reflects the domain we’re trying to verify.
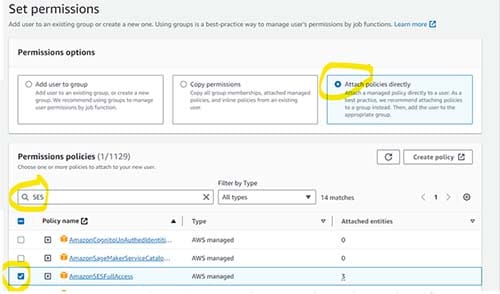
On this page, we need to set the permissions for this user account. Choose ‘Attach Policies Directly’ and in the search box, type SES. Scroll down until you find AmazonSESFullAccess and select that. Scroll to the bottom of the page and click Next.
Review everything to make sure that it’s correct and click on Create User.
On the next page, you should see a green banner to quickly view your newly created user. Click on View User. If you don’t see the banner, don’t panic. Your new user will be in the list of accounts on this page. Simply click on the user name to proceed to the next step.

On the User Account page, click on the security credentials tab. In the Access Key section, click on create Access Key. Choose Other as a Use Case Tag the key with a name that is reflective of the Domain and the Service. Click on Create Access Key.
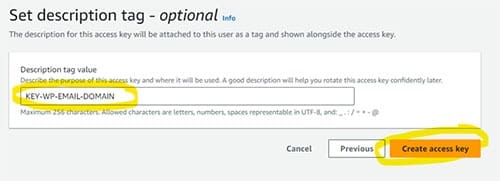
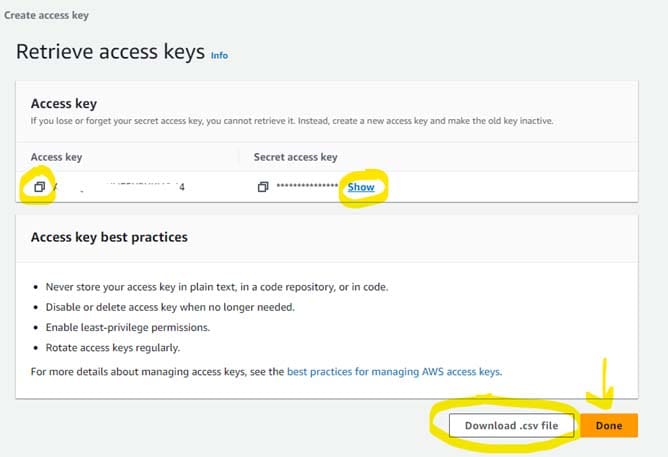
BE CAREFUL! This is the ONLY chance you will get to download the security key for this user account. If you lose it, you’ll have to regenerate the key and replace the key information in your application.
Copy the values to a safe and secure space. I use 1Password. It’s up to you if you download the CSV file. If you do, be sure that you store it safely.
Implementing SES
In order to use SES with your WordPress installation. You will need a plugin to act as an SMTP gateway. I prefer FluentSMTP. It’s a very robust plugin, and it’s free.
Check out their FAQ for additional information. Implementing this inside of WordPress is rather straight forward. You can store your Access Key and Secret Key in your database or add it to your wp-config file (preferred method).
Conclusion
It may look like a lot of steps, but it’s pretty straight forward. If you have any questions, Contact Us and I’ll try to point you in the right direction.
Take a moment to sign up for our newsletter, you won’t regret it!


